Showing posts with label recipes. Show all posts

Tuesday, March 19, 2013

March 13

March 13, 2013

Ok, so these first pictures were actually taken on March 10, but I just forgot to blog about them, so I'm doing it now. Being inspired by The Biggest Loser, we decided we would try and make spaghetti squash. They talk about it all the time on the show; we're never inspired to workout after watching, but we are inspired to cook. We bought a squash, we watched youtube videos on how to cook it, and we went to work. 
First, you cut the squash in half lengthwise. This is definitely the hardest part. These things are thick and dense and very difficult to cut. 
Then you place the two halves inside part down on a foil lined baking sheet. 
Cook for about an hour on 375. 
Pull them out of the oven and let cool for about 30 minutes.
Then go around the edges and pull the fruit out just tad.
Once you've gone all the way around you can just start scooping it out. It's really so so cool.
One of the videos we watched said you can just put it in a bowl with some butter and toss with Parmesan cheese. I'm sure this would be delicious, but we topped it with homemade marina sauce. I was beyond shocked at how it tasted exactly like spaghetti noodles, right down to the texture. We will definitely be making it again.

Ok. So now onto March 13. Nothing too exciting happened today, and by the time 9:00 rolled around I realized I still hadn't taken a daily picture to blog about. Brad decided he needed to feel a little smarter while studying, so he put on these fake glasses we love to play with. They definitely helped boost our studying power. Even Killer felt a little smarter.

Courtney


Thursday, July 26, 2012

Recipe of the Week: Crispy Chicken with Creamy Italian Sauce and Bowtie Pasta

I love pinterest. (Follow me HERE.) I especially love perusing the recipes. I've found some really good recipes, and I've found some really bad ones. Like so bad that after-one-bite-we've-had-to-toss-the-rest-of-the-meal-out-bad. And others that after a little tweaking have turned out much better than the first time I made them. But all-in-all I've benefited greatly from pinterest recipes. And I've definitely added to my stash of awesome meals. Last night I made one of our more regular tweaked pinterest recipes.

Crispy Chicken with Creamy Italian Sauce and Bowtie Pasta


what you need:
3 large chicken breasts
5 cups Panko Japanese bread crumbs
3/4 cup flour
1/2 teaspoon salt
1/2 cup milk
6 Tablespoons olive oil
1 12oz. package bowtie noodles

1/2 container Philadelphia Cooking Cream (Italian Cheese and Herb flavor)
1 can cream of chicken soup
1/2 cup chicken brother
1/4 cup milk
fresh parsley, chopped

what you do:
1. Add the 1/2 teaspoon salt to the 3/4 cup flour. Stir to combine.
2. Place the panko and the milk in separate bowls. (So you should have 3 bowls of stuff.)
3. Place your chicken breasts in a gallon sized ziploc bag and seal the top. Pound the chicken flat with a meat mallet (or whatever you have handy).
4. Slice the pounded breasts into strips.
5. Dredge the chicken in the flour, making sure to cover both sides. Throw in the freezer for about 5 minutes.
6. Start cooking your pasta.
7. Remove chicken from the freezer and dredge each piece in the milk and then immediately into the panko, making sure to cover both sides.
8. Lay each piece in a skillet coated with olive oil. Sprinkle with pepper.
9. Cook over medium high heat for about 5 minutes or until the undersides are golden brown.
10. Turn the pieces over. (If you're pan is dry just add a little more olive oil and swirl it around the wet the whole pan.) Cover and cook for another few minutes until the chicken is cooked through.
11. Once the chicken is done place it on a plate and cover with tin foil (or let it sit in your microwave...just do something to keep it warm).
12. Into the same pan pour the broth, cooking cream, cream of chicken, and milk. Whisk the sauce around and let it get warm and bubbly.
If you've never used this stuff before, it's great! We love it. You can find it by the cream cheese in your grocery store.
13. Serve the chicken over the cooked pasta and sauce. Garnish with parsley.

Happy eating,

Courtney


Crispy Chicken with Creamy Italian Sauce and Bowtie Pasta
 
3 large chicken breasts
5 cups Panko Japanese bread crumbs
3/4 cup flour
1/2 teaspoon salt
1/2 cup milk
6 Tablespoons olive oil
1 12oz. package bowtie noodles

1/2 container Philadelphia Cooking Cream (Italian Cheese and Herb flavor)
1 can cream of chicken soup
1/2 cup chicken brother
1/4 cup milk
fresh parsley, chopped

1. Add the 1/2 teaspoon salt to the 3/4 cup flour. Stir to combine.
2. Place the panko and the milk in separate bowls. (So you should have 3 bowls of stuff.)
3. Place your chicken breasts in a gallon sized ziploc bag and seal the top. Pound the chicken flat with a meat mallet (or whatever you have handy).
4. Slice the pounded breasts into strips.
5. Dredge the chicken in the flour, making sure to cover both sides. Throw in the freezer for about 5 minutes.
6. Start cooking your pasta.
7. Remove chicken from the freezer and dredge each piece in the milk and then immediately into the panko, making sure to cover both sides.
8. Lay each piece in a skillet coated with olive oil. Sprinkle with pepper.
9. Cook over medium high heat for about 5 minutes or until the undersides are golden brown.
10. Turn the pieces over. (If you're pan is dry just add a little more olive oil and swirl it around the wet the whole pan.) Cover and cook for another few minutes until the chicken is cooked through.
11. Once the chicken is done place it on a plate and cover with tin foil (or let it sit in your microwave...just do something to keep it warm).
12. Into the same pan pour the broth, cooking cream, cream of chicken, and milk. Whisk the sauce around and let it get warm and bubbly.
13. Serve the chicken over the cooked pasta and sauce. Garnish with parsley.


Friday, June 29, 2012

Recipe of the Week: Fettuccine Alfredo

I love pasta. Like a lot. I could eat it all the time. Five of my go-to dishes that I can make right off the top of the head with no recipe (because I make them so much and have memorized the recipe due to sheer routine) have something to do with pasta. It's just so easy and usually pretty fast. Last night I made one of these staple pasta dinners.

Fettuccine Alfredo


what you need:
1 1/2 cups milk
1 1/2 cups heavy cream
1/2 cup Parmesan cheese, grated
1/2 cup Romano cheese, grated
6 egg yolks 
black pepper to taste

what you do:
1. Start your noodles boiling. (You obviously don't have to only use fettuccine. There have been several nights that I've made this and haven't had any fettuccine. Use whatever you have.)
2. Heat milk and cream in a heavy bottom saucepan until it begins to simmer. (Heavy cream is a staple in my house. I use it for everything - not the healthiest but so delicious.)
3. Place egg yolks in a separate bowl and slowly whip in a portion of the hot milk and cream mixture.
I don't have an egg separator. Not for lack of wanting one though. I've been half-heartedly looking for one for a while but haven't found one as of yet. So in the mean time, I separate my egg using the old school method of utilizing the egg shell.
4. Ok, back to the milk/cream mixture...Slowly whip in cheese, then remove from heat.
I use fresh Parmesan cheese. I tried it once with the already grated kind you can just buy in the pasta aisle at the grocery store. I thought it was good until the next time I used fresh Parmesan. So.Much.Better. The Parmesan is on the left. I use Pecorino Romano as the other cheese. I usually already have it in the house, because I use it for the baked ziti that I frequently make. You can get it at a really good price at Costco, but you get a lot (imagine that, getting a lot of something at Costco). So if you can use it before it expires then I'd suggest buying it at Costco. It lasts a lot longer than cheddar or mozzarella or other "sandwich" cheeses. But you can always get it at a normal grocery store in the deli section.
Melting all the cheese and stirring it all into the milk/cream mixture is the hardest part. Just be patient with it and stir frequently.
5. Slowly add egg yolk mixture into milk/cream/cheese mixture.
6. Place back on low heat and continually stir until simmering.
7. Take sauce off heat so it thickens and so that the eggs temper.
8. Season with pepper.

Honestly, this sauce is better the next day after it's had so time to sit in the refrigerator for a while. What I try to do is make it the night before and chill it until dinner the next night. Just throw it in the microwave or back in a saucepan and heat until warm. This doesn't always happen though. It'll still taste delicious right after you make it.

You can also grill up some chicken, slice it, and add it to your sauce. 

Here's what our dinner looked like last night:
The bread is also a staple at dinner here in the Andersen household. Just butter a slice of bread, sprinkle it with garlic powder, and throw it in the oven on broil for about 30 seconds (just until it starts browning). Also if you want to be super fancy you could add some shredded cheese on top.

Happy eating,

Courtney

Alfredo Sauce

1 1/2 cups milk
1 1/2 cups heavy cream
1/2 cup Parmesan cheese, grated
1/2 cup Romano cheese, grated
6 egg yolks
black pepper to taste

1. Heat milk and cream in a heavy bottom saucepan until it begins to simmer.
2. Place egg yolks in a separate bowl and slowly whip in a portion of the hot milk and cream mixture.
3. Slowly whip in cheese to the milk/cream mixture, then remove from heat.
4. Slowly add egg yolk mixture into milk/cream mixture.
5. Place back on low heat and continually stir until simmering.
6. Take sauce off heat so it thickens. (This will increase the temperature of the egg yolks, known as tempering.)
7. Season with black pepper. Serve over your favorite pasta.
 

Tuesday, June 26, 2012

Recipe of the Week: Crockpot Ravioli

I've totally been MIA for the past month on the recipe of the week. So I'll be trying to catch up this week by posting almost everything I cook. Tonight I'm making the easiest thing in my cookbook. It has 3 ingredients. Yes, you read that right - THREE ingredients.

 Crockpot Ravioli 


what you need:
one 20 -25 oz package of refrigerated or frozen ravioli
one jar spaghetti sauce
1 cup shredded Mozzarella cheese


what you do:
1. If you bought refrigerated ravioli you'll need to throw it in the freezer overnight. This is what I do because I haven't found frozen ravioli anywhere. You can get any kind you want, but we tend to be pretty boring and stick with just cheese filled ones.
2. Dump your raviolis into your crockpot.
3. Pour on the sauce. I usually make my own spaghetti sauce, but today I was especially lazy and just used store-bought from a jar.
4. Be careful! This is the hardest step. :) Stir the ravioli so they are all evenly coated with the sauce.
5. Set your pot to low and cook for 2 1/2 hours. My crockpot tends to cook pretty hot, so if after 2 1/2 hours you don't fill like they're completely done just throw them in for another half hour and turn up to high. Be sure to stir occasionally so that the ravioli doesn't stick to the side and burn.
6. After the 2 1/2 hours is up either turn down the crockpot to warm or turn it off completely. Sprinkle on your shredded cheese and replace the top.
7. After about 5 or 10 minutes the cheese will be melted, and you'll be ready to eat. Serve with some French bread and toss a salad, and you'll be good to go.

Happy eating,

Courtney


Monday, May 28, 2012

Recipe of the Week: Mom's Chicken Nuggets and Diced Potatoes

Here's another yummy and easy recipe. Back when I was leaving home for college heading to the wild wild west, I spent a few days going through all my mom's hundreds of recipe cards and wrote down all the ones I thought seemed easy enough for a girl just started out learning to cook. This one has always been a favorite in our house. Brad loves it, and every time we have it for dinner he acts like it's the first time he's ever eaten it, constantly telling me how good it is.

Momma B's Chicken Nuggets

what you need:
1 pound chicken breast (Brad and I usually eat 1 to 1 1/2 breasts)
1/4 cup melted butter
1/4 cup flour
1/2 cup grated Parmesan cheese
1 teaspoon salt
1 teaspoon basil
1/4 teaspoon thyme
1 teaspoon paprika
1 teaspoon parsley

what you do:
Cut chicken into 1 1/2 inch squares.
 
Mix dry ingredients.

Melt butter. (It doesn't have to be completely melted. As you can see, I still have a few soft parts in there.)

Dip chicken into melted butter and then into mixed dry ingredients. WARNING: you'll get messy.

 Arrange nuggets on a foil-lined, sprayed baking sheet. Bake at 400 degrees for 20 minutes.
 (Crazy Blogger keeps flipping this picture 90 degrees and won't let me change it! Gah! Sorry for the required head-tilt.)

Beyond Easy Diced Potatoes

I've tried tons of different potato recipes using millions of combinations of spices, cheeses, gravies, you name it. But one day I decided enough was enough, and I just gonna butter some taters and throw in the oven. And I've never looked back - so yummy!

what you need:
potatoes (Brad and I usually eat 2 large potatoes)
butter

what you do:
Dice your potatoes. I dice them pretty small so they'll cook faster - like maybe in half inch-ish sized cubes. Place cubed potatoes in foil-lined pan (if I can line a pan with foil before I cook whatever's in the pan I do it - love me some easy clean-up).
 
Pile on the butter. If you use as much butter as I do (which I totally recommend) you won't need to spray your pan. I used about a half stick. Just cut little pieces and evenly distribute around pan.

If I'm not cooking these with the nuggets from above I usually bake these suckers at 350 for 30 minutes. But I just throw them in about 5-10 minutes before the nuggets (so just put the potatoes in and then start on the nugget prep) at 400 degrees, and they'll totally fine and cooked by the time the chicken's done.

Brad likes ketchup on his (and on the nuggets as well), and I do salt and pepper. Whatever your fancy.

Oh, and on a side note. What the heck happened to this potato?? It's got a 3 inch gap right in the middle of it. It was disgusting and got tossed.

This is definitely a mono-chromatic meal, so I usually try to throw in some green fruit like apples or kiwis or grapes or maybe even some green veggies like spinach or broccoli.

Brad was so excited for this yummy dinner that he took another picture of it once it was one the table. 
The drinks are frozen strawberry limeades. I found the recipe on pinterest, and they're super yummy. HERE'S the link.

Happy eating,

Courtney

Momma B's Chicken Nuggets

1 pound chicken breast
1/4 cup melted margarine
1/4 cup flour
1/2 cup grated Parmesan cheese
1 teaspoon salt
1 teaspoon basil
1/4 teaspoon thyme
1 teaspoon paprika
1 teaspoon parsely

Cut chicken into 1 1/2 inch squares.
Mix dry ingredients.
Dip chicken in melted butter.
Arrange on foil-lined baking sheet.
Bake at 400 degrees for 20 minutes.

Monday, May 21, 2012

Recipe of the Week: Tomato, Mozzarella, Basil, and Tortellini Skewers

I've decided to post one recipe a week. Hopefully this will benefit anyone who reads this blog by giving ya'll new ideas, but honestly I'll be doing this more for myself. I don't know about you, but I frequently find myself making the same old things. I have certain recipes that I love and know by heart, and they get a lot more table time than anything else. By posting just one recipe each week I feel like I'm pretty much guaranteeing at least a little variety in our meals (that is, after I finish posting about all the recipes I know like the back of my hand :))

This week: 
Tomato, Mozzarella, Basil, and Tortellini Skewers

What you'll need:
grape or cherry tomatoes
mozzarella cheese
fresh basil leaves
tortellini
olive oil
black pepper

What you'll do:
1. First get your tortellini started boiling, and cook for about 8 minutes (or whatever the package says). Make sure you put a little olive oil in with the water so they don't stick together. (I bought this kind at Kroger, but my favorite kind is at Costco - because they're colored, not because they taste better.)
2. This step is completely optional. Roast your tomatoes. Put them on a foil-lined pan, drizzle with olive oil, sprinkle with black pepper, and throw in the oven on broil. They won't need to be in there for long. Just turn on your oven light and watch them. They'll start wrinkling, but you don't want them to pop. *If this sounds like too much work, just don't do it*
3. Now get your cheese and basil ready. I just pulled off chunks of cheese from the block, but you can certainly be more fancy and cut it. 
I did the same thing with the basil leaves. Some were ginormous, so I just shredded them into smaller pieces by hand.
4. Put the skewers together, and enjoy!
 This seriously takes about 15 minutes. The longest part is letting the pasta boil. And it's a great (and super easy) summer time meal.

Now if you can't handle thinking about eating a tomato you're not alone. I just can't eat them either. No way they're cut, cooked, grilled - nothing. So, I put this lovely meal together for my sweet husband who LOVES tomatoes, and I ate this:
I figured it was pretty much the same thing. Homemade tomato sauce, tortellini, and fresh basil on top. :)

Happy eating,

Courtney


Wednesday, August 3, 2011

Domestication

I recently canned some jam. That's right - I made strawberry jam and then I canned it. If that isn't just the definition of domestic, I don't know what is. It all started when Brad and I were grocery shopping one day. We go to the Cobb International Farmers Market to get all our produce and meat because it's so darn cheap (and delicious). Right as we walked in the door we saw strawberries. Two containers for $1! That's unheard of! You can't even find one container for $1 normally. Turns out it's because they were super ripe and were going to start rotting soon, but still 2 for $1! I quickly crossed off Jam from my grocery list and bought 4 things of strawberries, determined to go home and make something yummy with them.
When we got home, I looked up tons of recipes and finally found one I liked. I halved and hulled all the berries per the recipe, and right as I was warming up my sauce pan on the stove I realized that in order to can strawberry jam I would most definitely need CANS! So I placed my berries in the frig and was off to walmart. I got home with my cans (and fruit pectin) and was so excited I could burst. But wait, how do you can things anyways? I found this awesome intro to canning that was totally written for people just like me who have never before in their life canned anything. But it would also be just peachy for those of you who have done this a million times and just need a little refresher course. Are you ready for it....drum roll, please....

Oh, and by the way, here's the recipe:
5 cups crushed strawberries (approximately 3 pounds), hulled and halved
2 Tablespoons fresh lemon juice
7 cups sugar 
1/2 teaspoon butter
1 packet fruit pectin
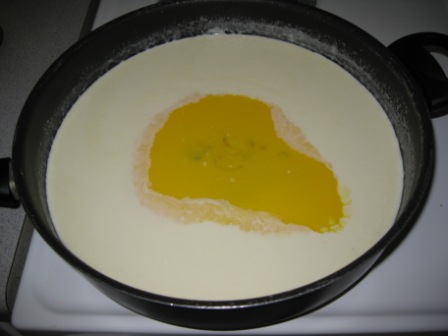
Combine crushed strawberries and lemon juice in a sauce pan. Still in fruit pectin and butter. Bring to a full boil over high heat, stirring constantly.
Add the sugar and stir until dissolved. Return mixture to full boil. Boil for one minute and then remove from heat.
Fill jars.

Let's begin.
The very first thing you need to do is wash all your jars and lids in HOT, soapy water. I had Brad complete this step for me. My poor little hands just have such a low pain tolerance when it comes to super hot water. Thanks hun :-)!

The next step is to keep your jars warm. If you let them cool down to room temperature and then put scalding hot jam in them they'll most likely break. (Vice versa as well...Brad once put a glass dish hot from in the oven into the sink and ran cold water over it without thinking and it shattered...oops!) So I just heated up some water on the stove to a simmer and put my jars in there until I was ready for them.

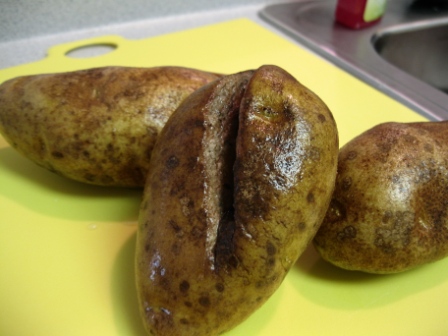
Now for the fun part - preparing the jam! The strawberries don't have to be perfectly crushed. You can still have a few bigger pieces. It'll taste great no matter what.


7 cups of sugar is seriously almost a whole 5 pound bag. Lots and lots of lots of sugar.

The next step is to fill your nice and warm jars with your toasty jam. You'll want to fill them up to about here. Apparently, according to my handy dandy canning guide, the jam will expand in the jar during the canning process, so you need to give it plenty of room to do so. Wipe any extra jam from the sides of the jars and put your lids on. Not too tight though - "fingertip tight" - in order to let the air inside escape while canning.

I don't have any pictures of the next couple of steps...sorry.
So I didn't have many of the essential tools, but everything worked out just fine. You need a pot that is deep enough to cover the jars with at least one inch of water. (I don't have a pot that large, so I used the biggest one I had, which only covered the jars with about 2 centimeters of water. But I definitely suggest using a bigger pot if you have one. In fact, I'll be buying one before my next canning adventure.) Before you put the cans straight into the water, put them on one of these things:
A canning rack. This would have been lovely to have, but if you don't have one (like me) you can still can without it. (But once again, I'll probably buy one before next time.) 
So once you've got your jars in your pot, cover the pot and boil for 5 minutes (I didn't cover the pot because all my extra water would have spilled out and everything turned out fine). P.S. the canning guide I linked to earlier has a chart with altitude adjustments for cooking time.
Next, I had a second pot filled as high as I could with simmering water. I [Brad] moved the jars from the boiling water to the simmering water and let them sit for 5 minutes. Then you place them on a towel or cooling rack and leave them alone for 12 hours.
Sorry for the blurriness.

I baked some homemade bread and we enjoyed our DELICIOUS strawberry jam on fresh warm bread. Yum.

Love, Brad & Courtney