In my first domestication post I wrote how I made my very own homemade strawberry jam. It was much more of a blog-worthy post than this one will be since I took step-by-step pictures documenting the process of making jam. No step-by-step instructions here. Oh well.
My sister Elizabeth needed some good ole fashioned pioneer clothes for the youth conference trek her ward was going on over the summer, so I whipped a little something up for her.
 I didn't use patterns for the apron or the skirt. I just cut out the fabric and sewed it together. However, I got the bonnet pattern HERE.
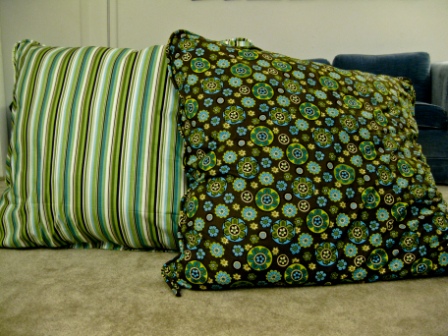
My next project was extra large lay-on-the-floor-to-watch-movies pillows. Check out the post right before this one to read step-by-step instructions.

My sister Elizabeth needed some good ole fashioned pioneer clothes for the youth conference trek her ward was going on over the summer, so I whipped a little something up for her.

My next project was extra large lay-on-the-floor-to-watch-movies pillows. Check out the post right before this one to read step-by-step instructions.

Christmas time was filled with lots of little crafting projects. First I made this sweater for Killer. The ones we bought her last year don't fit anymore, and since we don't turn on our heat at all ever during the winter, on cold days we like to put her in a sweater while we're away from home.

She's so festive! Once again, I didn't use any pattern. I just measured her and cut. This doggie sweater is made out of an actual sweater. I just went to Goodwill and bought one that looked cute.
So I didn't make this tinsel, but the picture's so cute I couldn't resist throwing it in.

I made lots of these temple recommend covers to give away as Christmas presents. It's super simple - plastic canvas (you can find it at Michael's) and white yarn. Also, your life will be much easier if you have a needle big enough to handle yarn. Still no pattern. I just looked at mine and copied it.

I made these adorable snowmen for my grandmother. I'll have to make some more for myself next Christmas since they make such great decorations. They seriously took maybe 10 minutes total to make. Go HERE for the tutorial.

Susie gave us a ton of Christmas tree balls last year - way more than could ever fit on our tree. Rather than leave them in their box collecting dust I made this great wreath out of them.

There's about a hundred different ways to make these, but I followed THIS tutorial.
In order for Killer to have something under the tree beside just treats I made her another, not so Christmasy, sweater. This one's also made from a Goodwill purchase.


Here's to another year of projects and crafting and becoming even more domesticated!